JtRH: Courage
 Comments(0)
 So, I fell out of the habit of blogging for a few weeks coinciding with a significant difficulty spike in Journey to Rooted Hold that led to me not playing it for a while. Level 24 is the last floor before the climax and finale, and several of its rooms strike me as tougher than the secret rooms and Challenges elsewhere. I’m talking puzzles that take me multiple sessions to complete. I don’t remember having quite such problems on my first pass at the game. Of course, that was years ago — long enough ago that it predates this blog, and this is a fairly elderly blog — so perhaps I did and just don’t remember.
Or perhaps my mindset is different. I’ve been having particular problems with puzzles requiring courage. Much of the time, the game rewards caution: hanging back in defensible places and waiting for the monsters to come to you, clearing sub-areas out completely before moving past them, and so forth. But there are a number of ways that this approach can be made to fail. Sometimes you need to get stuff done quickly, before a fuse burns down or the tar gets out of control. Sometimes the time pressure is subtle enough that it takes a while to figure this out. Maybe I was more willing to take the necessary risks before the Challenge scrolls forced patience into me.
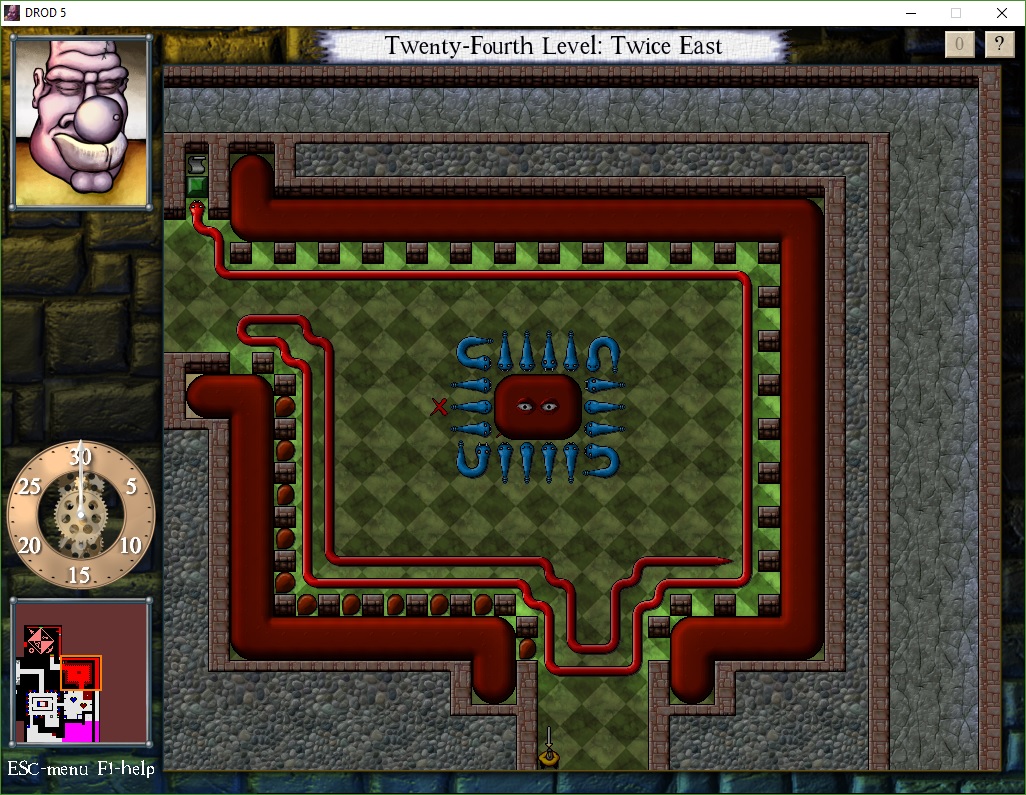 Let me describe just one puzzle specifically for its irony. L24:2E, the room that I spent most of the last few weeks not solving. Part of my problem here was that I incorrectly believed that I had thoroughly explored the rest of the level. In fact there was a tiny green door I had neglected, which would have ultimately led to entering 2E from the west. Instead, I entered from the south, and judged the room’s contents accordingly. In the center of this room is a tar mother hemmed in by blue rattlesnakes, which are immobilized until you upset the equilibrium with your sword. Around the periphery is a layered lining. First, a moat of mud. Then a porous wall that squeezes the mud into monsters when the mother makes it try to grow through it. Finally, keeping the monsters bound, a serpent. The serpent’s head is trapped, which makes its tail shrink one tile every round. (This applies only to serpents proper; the rattlesnakes have different rules.) As it shrinks, it will let the mud monsters out, one by one.
Now, if you enter from the south, the serpent blocks your way. You have to wait through two complete spawn cycles for it to shrink enough for you to do anything about the mud babies it’s liberated, let alone make headway into improving your situation. If you enter from the west, you can go straight to work, but, in my ignorance, the only way I could see to enter from the west was to cross through the room and then re-enter it. This is doable, but it requires courage. My first efforts were aimed at making the crossing safe by slowly and steadily clearing tar, but the approach that works is to just make a dash for it before the serpent unravels all the way.
That should have been the end of the major problems, but I built a lovely little trap for myself in my mind. See, this room has a challenge scroll, and it’s one of those challenge scrolls that’s locked behind a green gate, where you only get access to it after clearing the room. But sometimes you can guess on the basis of a room’s contents what the challenge will be. Since entering the room from the west seemed to be one of the the puzzle’s lynchpins, it seemed likely that the Challenge was to not do that. And so even once I knew how to reach the western exit, I was reluctant to take it. I actually made pretty good progress towards clearing the room from the south, and came up with some clever ideas to help, but it was a long process, and the lack of checkpoints around the periphery meant that I essentially had to start over after every little mistake. Eventually I decided that it was taking so long that it would be worth the effort to actually do the room the normal way once just to check the scroll and make sure I wasn’t wasting my time. And… it turns out that I was. The actual challenge was to kill the tar mother before the first growth cycle. Something that was simply impossible from the south, and pretty tricky from the west, and absolutely required courage, in the form of sneaking through snakes.
At any rate, I’m through it all now, and in fact have reached the game’s end, although I’m not done yet, because I’m going for Mastery. I’ll talk about level 25 in the next post.