Archive for 2017

Open Sorcery

I’ve been meaning to check out Open Sorcery since meeting its author at Indiecade last year, and I finally got around to purchasing it in the recent Steam sale. Since then, it’s become a finalist for Best Game in the Xyzzy Awards. And having played through it now, I see why. It’s a very engaging work, and one that goes to great lengths to meet the player halfway.

The basics: This is a story of AI awakening in a world of modern magitech. You play the role of BEL/S, a firewall that’s also a fire elemental, conjured and programmed by two friends and charged with keeping them and their kith and kin safe from evil spirits. Unusually for a commercial release, it’s written in Twine 1I know of only two other Twine games on Steam: Depression Quest and This Book is a Dungeon. And only one of those costs money. Firewatch gets an honorable mention here for having an intro that was prototyped in Twine and then put into the game more or less as-is. — there are a few pictures, but for the most part, output takes the form of text, and input takes the form of clicking on text. (There’s at least one moment of of freeform text entry as you guess at a chaos spirit’s riddles, but even this is done by clicking letters on the screen.)

Now, the point of view is decidedly nonhuman, unfamiliar with human things, and prone to describing stuff in a mixture of technical jargon and poetry. That has the potential to create confusion and communication problems — particularly in a choice-based game. I’ve certainly seen Twine pieces involving AIs or aliens or whatever where I had no idea what was going on, even after playing all the way through. Parser-based IF usually manages to avoid this by making progress contingent on understanding. As such, its failure mode is the player not making it all the way through, but even this is often avoided, because most information takes the form of room and object descriptions, which the player can view again when confused.

All of which is to say that Open Sorcery does an incredible job of keeping the player oriented. To start with, it makes use of routine. The game plays out over a series of days, and your primary task on each day is the same: visit the same four locations, look for signs of evil spirits, scan for any you find, and deal with them. On most days, there’s exactly one location with a spirit to confront, but you have to visit the other locations too, the better to experience plot elements that haven’t reached a crisis yet. There’s freedom within this structure, of course — once you locate and identify an evil spirit, you get to decide what to do about it.

Now, every spirit has two attributes, Matter and Motive, that you have to choose from a list of possibilities to identify it. (For example, BEL/S’s Matter is Fire, and her Motive is Order.) This is a necessary part of initiating an encounter; if you don’t know what you’re looking for, it remains invisible to you, and your progress in the story is blocked until you get it right. How do you know which Matter and Motive to choose? By paying attention to its effects on the environment. Notice that this is more or less the condition that I just described as typical of parser-based IF, that progress is contingent on understanding. In form and in purpose, the identification step is a puzzle — just not a puzzle you’re likely to get stuck on.

There’s a Twine technique I’ve described before wherein clicking on a word or phrase replaces it with a different word or phrase, going through several possibilities before settling on a final one. As I described it before, this is used to represent the narrative voice trying out different descriptions, different ways of thinking about things. Here, it’s used largely for clarifications to bridge the gap between player and protagonist, human and nonhuman. In fact, it bridges that gap in both directions. There are links that clarify BELS’s native jargon, as when the words “physical password” are replaced with “key”, and there are also links that give BEL/S a chance to google things, learning that the “edible organic matter” is a peanut butter and honey sandwich.

One way that the game really goes out of its way to be clear about what’s going on: Whenever there’s a conditional based on your character stats, it lets you know. If there’s an option that’s unavailable because you don’t meet the requirements, it’s displayed but grayed out. If there’s a response that’s conditional, it gets an entire page to itself, with the stat identified. This game wants you to know exactly how it works. I find it intriguing how different my response to this was depending on the stat used. There’s basically two sorts of stat: there’s your firepower, used to determine success and failure in blasting spirits with fire, and there’s your relationship level with several characters, used to determine their reactions. I’m accustomed to games where the mechanical details of characters’ minds are hidden from the player, the better to maintain the illusion that they’re not machines. So seeing the game call attention to the relationship stats so vehemently felt a bit strange. Stats in combat situations, on the other hand, I take in stride — so much so that I didn’t even notice that it was being treated the same way until I started writing about it here.

I haven’t really gotten into the story yet, but this is already a longish post about a shortish game, so I’ll leave off for now. I’ll probably have more to say about it tomorrow.

References
1 I know of only two other Twine games on Steam: Depression Quest and This Book is a Dungeon. And only one of those costs money. Firewatch gets an honorable mention here for having an intro that was prototyped in Twine and then put into the game more or less as-is.

Loot Hunter

The nondescriptively-titled Loot Hunter is a pirate-themed game in the genre that I’d call “puzzle-quest-like” if that weren’t so ambiguous. It’s ambiguous because Puzzle Quest was two-layered, an RPG wrapped around a match-3, and you can generalize that into either “RPG wrapped around an arbitrary minigame”, as in Runespell: Overture, or “arbitrary overgame wrapped around a match-3”, as in Hunie Pop. Loot Hunter is basically the latter, although the overgame is pretty RPG-ish in every way but presentation.

In presentation, it’s Grand Theft Galleon. Your ship freely roams a map of an archipelago, trading goods from port to port, doing optional quests, hunting for buried treasure, and attacking other ships for their booty. The game’s intro text makes it sound like you’ll have to choose between the path of the honest trader or that of the freebooter, but in fact there’s very little motivation to refrain from pursuing every path at once. Even if you’re just doing quests, the British can give you quests to attack French or Spanish vessels and vice versa. The three-sided faction system reminds me a little of GTA2, but only a little.

The main reason I’m singling this game out for a blog post is that it’s a very clear demonstration of something I’ve observed before: if you stuff a match-3 into an overgame, I will be unable to stop playing it, even after it stops being fun.

To be clear, it does start off fun. It starts off by giving you a bunch of things to explore! There’s a terrain exploration element, with most of the map shrouded by clouds until you sail them off. There are special ship-to-ship combat skills, essentially spells, to acquire and upgrade. There’s a series of increasingly large and expensive ships to buy, and items you can install in them for bonuses. And of course there’s the matter of figuring out the best tactics in match-3 ship-to-ship combat. The thing is, none of this lasts. It doesn’t take long to explore the full extents of the map, and once you’ve done that, there’s no more exploration. It doesn’t take long after that to max out your spells. Once that’s done, there’s nothing stopping you from discovering the optimal tactics, which you don’t have to vary ever.

Well, that’s not quite true. Sometimes you’ll be attacked by a ship that’s simply too powerful for you — say, if they have enough cannons to take you down in three volleys or fewer — in which case your tactics should shift to rapidly acquiring enough mana to cast the “escape from combat” spell. But in all other cases, including cases where the enemy outguns you only a little, you can treat all encounters the same, because they basically are. There’s none of the variability in rules or abilities or obstacles or even just board shape that I expect of a good match-3; the only differences between ships are differences in power. Even when the game describes an encounter as being with a group of ships instead of only one, it’s treated like just one larger ship in combat.

Once you’re that far, the game is really significantly reduced, and you’ve still got hours before you can afford the biggest of ships. And yet I wound up playing long enough to do that, and a little while longer besides. At this point, I’m not really getting anything out of the experience, apart perhaps from the opportunity to listen to it — the music is really lovely, varying from Jolly Little Nautical Tune to Stirring Adventure Music to Dark Orchestral Menace, and the sound of splintering wood from the cannons is really well-done. The game doesn’t seem to strictly have an ending, but there’s one more goal — maxing out your social status — that’s so close that I may well wind up playing to that. After that, there are some Achievements that are basically only achievable by playing for a very long time after the game has been rendered completely trivial and devoid of further goals.

The lack of a definite ending may be the game’s biggest design problem. An ending provides a basis for balance: ideally, in a game based around leveling and upgrades, everything the player is doing should reach its peak at around the game’s end, which is to say, at around the same time. Lacking anything like this to tether the game’s systems to, different parts of Loot Hunter have their endings at wildly different times.

Fluid Armies

OK, obviously I was going to take a little break from DROD when the Steam Summer Sale came up. Like last time, I’d like to take a brief look at a few of the things I bought for cheap.

As usual, I started by just getting the cheapest things on my wishlist — and from the results, I think I must have really been nostalgic for xbattle recently. This is a game I remember playing back in college, at a time when online multiplayer games were only easily played at an academic computing lab. Apparently there are multiple games called “xbattle”, so I should specify that the one I mean was a primitive RTS, named for its use of the X11 windowing system, and notable mainly for its high degree of abstraction. The battlefield was a grid of squares (or hexes, but we mainly played it in square mode), and any troops were represented by a colored square within that, the number of troops indicated by the size. Certain points on the map produced more troops at a steady rate for whoever captured them. You moved troops around by pointing squares at adjacent squares, causing the color to slowly drain from one to the other over time at a rate governed by their size difference. Consequently, the game was mainly about supply lines, each player trying to keep troops flowing efficiently to the front and interfere with the opponent doing the same, to keep them from pumping in reinforcements as fast as you.

As my choice of words here indicates, it feels a lot more like a game about fluids than a game about armies. Supply lines visibly have a pulse — we sometimes called it “the pulsing squares game” back in the day. Directing troop movement is a matter of opening and closing valves.

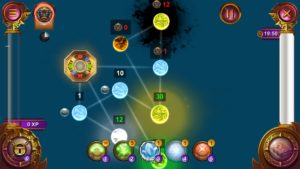
Of the games I’m recognizing as xbattle-like, Five Elements, a casual game with slick production values, is the closest and clearest. It uses a semi-randomized freeform graph of nodes instead of a grid, but it the essential mechanics are the same: opening spigots from node to node, pouring substances to fight. If anything, it’s a purer expression of the idea than xbattle is, because it makes no pretence that the fluids are armies. The battles are called “meditations”, and are supposed to be taking place inside the player character’s head. The enemies are aspects of his mind that he’s trying to subdue, such as Laziness and Fear and Anger, with appropriate special abilities. Instead of troops, you’re channeling abstract essences drawn from traditional Chinese alchemy, the five elements of the title. These are bound up in an extended rock-paper-scissors cycle of vulnerabilities and resistances: water beats fire, obviously, but also water “devours” metal, meaning that attacking an enemy’s water node with your metal node will strengthen it. Every pair of elements has one of these relationships — either one destroys the other or one devours the other. I find this difficult to keep track of, in part because the visuals don’t suggest the elements very clearly. The UI provides some help here, displaying an icon indicating what you’re in for before you open a spigot, but it’s still hard to make long-range plans under time pressure when you’re querying every possibility this way. Perhaps for this reason, the levels tend to be small. There’s a lot of them, though. This is clearly meant to be played in little bits over a long period of time, and I don’t know if I’ll want to keep up with it to the end.

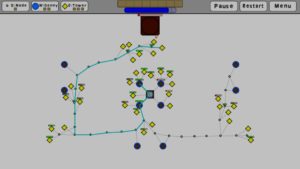
Energia, a shortish lo-fi indie piece, also uses a freeform graph, because the graph is one that you build yourself, by placing nodes and blasters and linking them up to pre-existing power sources. It’s basically a tower defense, and it doesn’t much feel like you’re piping fluids around — it goes for more of an electricity feel, with energy leaping through nodes of the graph instantly. But I count it as xbattle-like for two reasons. First, it’s largely about maintaining those supply lines. Attackers can come in from any direction and sever your graph at any point that isn’t adequately defended. Secondly, it’s extremely abstract. This is a not really a representation of a battle, and the game takes advantage of the fact when serving up variations. For example, one level is based on the idea that the battlefield is constantly scrolling to the right. Your base is fixed in place on the right side, the enemy’s base is on the left, but everything else, including anything you build, moves past you and then is lost. Playing this level feels like trying to walk up a descending escalator. Another level puts all the power sources on a pair of large rotating circles. Basically, the game’s greatest strength is the variety it can get away with because it’s nonrepresentational.

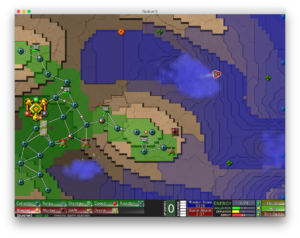
The highly satisfying Creeper World is mechanically similar: it’s basically a tower defense in which you build a network of nodes that rely on their connection to your main base to receive power. “Energy packets”, for construction and ammo, visibly flow along the lines of the graph, giving it a little bit of that fluid-and-pipes feel. The part that really feels fluid, though, is the enemy, called “creeper”. Creeper is quite visibly a liquid. It’s like you’re fighting the ocean. It’s viscous enough that it takes a while to level out and can even pile up around its outflow pipe, but it quite visibly flows like a liquid, ripples when you drop a mortar shell into it, fills up holes in the ground in preference to advancing toward your base — elevation is key in so many ways. (A note in the game says that it’s actually modeled on heat flow, but physics has a way of repeating itself in different contexts.) As a result, you get to play offense in the supply-line game. Cut off all the inlets into a lakebed, and it’ll dry up, at which point you can claim it for yourself. That’s one of the more satisfying things in the game: painstakingly cutting through a crucial stretch of creeper and seeing sudden and dramatic effects.

JtRH: Mastery

There’s a room pattern introduced back in level 16 of Journey to Rooted Hold, of rooms entirely filled with bombs except for a narrow and squiggly path. Accidentally nudging a bomb with your sword makes the entire roomful blow, emptying it in an instant. It’s the game’s strongest expression of overwhelming power, so of course the designers bring the pattern back when it’s time to kill the Slayer. The climactic one in level 25 is easier to navigate than the ones on level 16, though, which strikes me as a smart move. The main purpose of this room is story, not puzzle, and it wouldn’t serve the story to frustrate the player right on the verge of victory over the main antagonist.

In fact, that could apply to most of the level. Apart from the ending, level 25 is mostly about a new enemy, the red-uniformed “Guards of the Poppy Brigade”, brought in by the Slayer for a last-ditch holding effort. These guys are kind of like Slayers, but not as smart. Like the Slayer, they wield weapons, and they know how to navigate around walls (which makes them smarter than most monsters), but they’re vulnerable to some really basic swordfighting tricks. They like to keep their swords pointed toward Beethro even when that’s not the right thing to do, letting you kill them with maneuvers that they could have blocked if they knew the right dances. So they’re only dangerous when they mob you from multiple directions. The rooms do build up to that, but only after a whole bunch of easy tutorializing, and even when the puzzles get hard, the guards still kind of feel easy just because I’m mentally comparing them to the Slayer. Being mobbed just enhances that, because it’s an opportunity to kill them in droves.

Now, in that final Slayer room with all the bombs, there’s a moment of hypocrisy so pointed that it has to be deliberate. When Beethro lights the fuse, the exasperated Slayer complains that Beethro doesn’t know what he’s doing and that he’s putting “many thousands of innocent lives” in danger. And he has a point – Beethro really doesn’t know what the consequences of his delving will be, and we know from subsequent games that a whole lot of people, both surface-dwellers and citizens of the Empire, wind up getting killed. But anyway, Beethro retorts that the Slayer isn’t in a position to lecture Beethro about killing people. The Slayer starts to reply that Abovegrounders don’t count, but catches himself, apparently aware for once of what he’s saying. The thing is, at this point they both act as if Beethro has won the moral high ground, even though he’s just cut his way through a battalion of Poppy guards, treating them like they don’t count because they’re Belowgrounders. Really, it’s all just furthering the same who’s-really-the-monster stuff that got started when Halph befriended the roaches, or even earlier, with the Neather.

After that, it’s on to the sequel. Beethro swears to get to the bottom of this whole Empire business, which he eventually does, literally. But the player isn’t done with the game yet. There’s still Mastery. This means solving every single room, including the hidden ones — and some of them are hidden much more cleverly than I remembered. (Completing all the Challenges is not necessary for Mastery, in part because Mastery existed before Challenges.) As I’ve said, the game gives you a lot of help here. You can reload any room you’ve visited, and once you’ve completed the main game, the “Restore” menu tells you the number of secrets on each level, making it a lot easier to find them. Hunting down your missing secrets on every floor is a nice way to look back at the whole game. I like to do it from the bottom up, as if returning from the journey Beethro hasn’t really finished yet.

Mastery gives you access to the “Dreamplane”, a sort of a museum of concept art and rejected room designs, which you explore in the same engine as the rest of the game. It’s impressively large, easily the largest level in the game, and I find it oddly engaging. Usually I’m not much interested in concept art galleries in games (unless the concepts are very different from the finished work), but piloting Beethro around the floors, looking for interactive bits but not really worrying about puzzles, is a relaxing end to a sometimes frustrating game. Moreover, there’s an element of the uncanny to it. See, the Dreamplane is physically accessible from the dungeon. There’s a stairway to it on level 13. You can’t explore beyond the entrance room until you achieve Mastery, but you can at least enter the level, which gives it something of an aura of in-fiction reality, despite being completely fourth-wall-breaking. Furthermore, getting past the Master Gate and into the rest of the Dreamplane effectively requires time travel. Now, when you jump around from level to level looking for secrets, you’re effectively rewinding time back to earlier points in your explorations, but this is non-diegetic time travel, more like turning back the pages of a book. The resulting Mastery doesn’t violate the narrative because even if you didn’t get all the secrets on your first pass, you theoretically could have done so. Getting past the entrance to the Dreamplane, on the other hand, isn’t theoretically possible within the narrative, because there are multiple points of no return between level 13 and level 25. Time travel isn’t necessary for Mastery, but it is necessary for getting back to that Gate once you have it. And once you have a physically real place that’s only accessible through metanarrative trickery, you have something very strange indeed.

JtRH: Courage

So, I fell out of the habit of blogging for a few weeks coinciding with a significant difficulty spike in Journey to Rooted Hold that led to me not playing it for a while. Level 24 is the last floor before the climax and finale, and several of its rooms strike me as tougher than the secret rooms and Challenges elsewhere. I’m talking puzzles that take me multiple sessions to complete. I don’t remember having quite such problems on my first pass at the game. Of course, that was years ago — long enough ago that it predates this blog, and this is a fairly elderly blog — so perhaps I did and just don’t remember.

Or perhaps my mindset is different. I’ve been having particular problems with puzzles requiring courage. Much of the time, the game rewards caution: hanging back in defensible places and waiting for the monsters to come to you, clearing sub-areas out completely before moving past them, and so forth. But there are a number of ways that this approach can be made to fail. Sometimes you need to get stuff done quickly, before a fuse burns down or the tar gets out of control. Sometimes the time pressure is subtle enough that it takes a while to figure this out. Maybe I was more willing to take the necessary risks before the Challenge scrolls forced patience into me.

Let me describe just one puzzle specifically for its irony. L24:2E, the room that I spent most of the last few weeks not solving. Part of my problem here was that I incorrectly believed that I had thoroughly explored the rest of the level. In fact there was a tiny green door I had neglected, which would have ultimately led to entering 2E from the west. Instead, I entered from the south, and judged the room’s contents accordingly. In the center of this room is a tar mother hemmed in by blue rattlesnakes, which are immobilized until you upset the equilibrium with your sword. Around the periphery is a layered lining. First, a moat of mud. Then a porous wall that squeezes the mud into monsters when the mother makes it try to grow through it. Finally, keeping the monsters bound, a serpent. The serpent’s head is trapped, which makes its tail shrink one tile every round. (This applies only to serpents proper; the rattlesnakes have different rules.) As it shrinks, it will let the mud monsters out, one by one.

Now, if you enter from the south, the serpent blocks your way. You have to wait through two complete spawn cycles for it to shrink enough for you to do anything about the mud babies it’s liberated, let alone make headway into improving your situation. If you enter from the west, you can go straight to work, but, in my ignorance, the only way I could see to enter from the west was to cross through the room and then re-enter it. This is doable, but it requires courage. My first efforts were aimed at making the crossing safe by slowly and steadily clearing tar, but the approach that works is to just make a dash for it before the serpent unravels all the way.

That should have been the end of the major problems, but I built a lovely little trap for myself in my mind. See, this room has a challenge scroll, and it’s one of those challenge scrolls that’s locked behind a green gate, where you only get access to it after clearing the room. But sometimes you can guess on the basis of a room’s contents what the challenge will be. Since entering the room from the west seemed to be one of the the puzzle’s lynchpins, it seemed likely that the Challenge was to not do that. And so even once I knew how to reach the western exit, I was reluctant to take it. I actually made pretty good progress towards clearing the room from the south, and came up with some clever ideas to help, but it was a long process, and the lack of checkpoints around the periphery meant that I essentially had to start over after every little mistake. Eventually I decided that it was taking so long that it would be worth the effort to actually do the room the normal way once just to check the scroll and make sure I wasn’t wasting my time. And… it turns out that I was. The actual challenge was to kill the tar mother before the first growth cycle. Something that was simply impossible from the south, and pretty tricky from the west, and absolutely required courage, in the form of sneaking through snakes.

At any rate, I’m through it all now, and in fact have reached the game’s end, although I’m not done yet, because I’m going for Mastery. I’ll talk about level 25 in the next post.

JtRH: Smart, but Not Smart Enough

And now I want to describe another hidden room with a Challenge. This one is on level 22, and my experience of it is pretty much the exact opposite of the one on level 20.

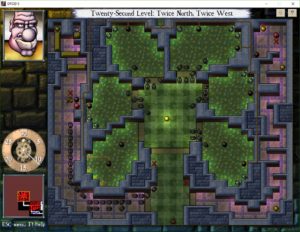
The theme of level 22 is something I mentioned recently: rooms that you can’t solve on first visit, although with an added emphasis on exposing the player to monsters on the first pass. Perhaps the pinnacle of this theme is 2N2W (that is, the room two rooms north and two rooms west of the entrance). This room has six blobby chambers arranged like flower petals, each containing at least two immobilized roach queens — enough to spawn roaches faster than Beethro can kill them — plus a passage on either side containing a Brain to make sure you can’t escape the roaches. As a hint to the player, Beethro says to Halph on initially entering the room from the south that he won’t be able to kill everything and that they should just get the doors to the west open and run for it. (This is most easily accomplished by just standing by the doors and fending off roaches while Halph runs around the other side of the room hitting the orbs that open them.) The western passage circles around through four other rooms and lets you re-enter the room from the north, where there’s a little isolated nook containing a fuse that ignites the bombs in the roach chambers.

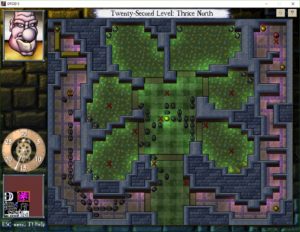
I describe that room in particular because the hidden room I want to describe, 3N, is a variation on it. It lacks the bombs, but it also changes the walls and the roach placement in small ways that, per Beethro’s assessment, make the room solvable without them. The conventional solution starts the same as in the original version, escaping to the west. This just takes you to a dead end in a different room — a room, in fact, that you’ve already visited by this point. The visible but inaccessible dead end is a clue to the existence of the hidden room. The point of visiting the dead end is that the room resets when you re-enter it from the west, granting you enough time to kill the Brain in that passage and then dash over to the eastern passage to kill the other one before the room gets too roachlogged to make that run. You still have massive amounts of roaches to deal with afterward, and getting past the first two chambers is difficult and time-consuming. But at least you get to engage the roaches on your terms, once the Brains are gone.

The Challenge scroll for the room is in the dead end to the west, and the Challenge is to complete the room without using the dead end. This is honestly not much different than doing it the normal way. My solution: First I ran into the southeast lobe of the flower and killed the queens there. That took enough time for the roaches to get perilously close, so I retreated to the western passage and killed the Brain there. Getting from there to the eastern passage took some time, and judicious use of Halph. I had reduced the roach spawn count to 28 every 30 turns, so I basically got to move forward just two squares every 30-turn cycle. It wasn’t steady progress — turning the corner from south to east was tricky — but once I was in the eastern passage, it was basically the normal solution from there on. That is to say, the most difficult part of the puzzle was still ahead of me at that point, the part that dominates the experience of the room and which is completely unaffected by the Challenge.

The thing that really gets me, the reason I call it the opposite of that other Challenge, is that the Challenge solution is less clever than the normal solution. I mean, I’m not at all sure I would have thought of using the dead end if the Challenge scroll hadn’t told me not to. Sure, it fits the level’s theme better, but as it was, the only reason I went to the dead end before completing the room was that I wanted to read the Challenge scroll. The Steam Achievement for completing this Challenge is “Smart, but Not Smart Enough”. It could be describing me.

JtRH: Walk Through the Storm

Level 20 contains a Challenge that delighted me so much, I have to spoil it in detail.

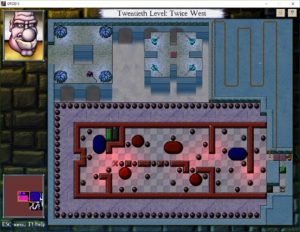
To start with, it’s in a hidden room. Most DROD levels have a few rooms like this, reachable through hard-to-spot crumbly walls or subtler trickery. Such rooms are flagged as optional, so this is where the designers put the more difficult puzzles. In this particular room, the Slayer shows up briefly as an additional warning: all he does is say “Good luck” and leave, confident in his trap.

Stepping into the room means stepping on a fuse. The fuse automatically lights, then burns down one square per turn on a wiggly path until it hits a bomb, which detonates, along with every bomb caught in its blast radius, every bomb caught in the blast radius of those bombs, and so forth. This is a fairly common pattern in JtRH; it’s a way of forcing the player to make their way to a safe spot within a time limit. This room adds a strange extra step by having the detonations come in two waves. You’ll see a red wall around the area containing Beethro: a trap door gate, which lowers when all the trap doors in the room have dropped. The initial blast gets blocked by the gate, but it lights a second fuse that crosses the gate and detonates the bombs inside.

Now, opening the gate would sever that second fuse, so why don’t we do that? 1Correction: Opening a gate under a fuse does not sever it. Only closing the gate under it does so. So that’s another reason to not pursue this strategy. Also, on looking at it again, it looks like some of the bombs inside the gate are within the blast radius of the bombs outside, and only shielded from them by the gate. So there’s that too.
[Added 29 May] No, never mind, all the bombs inside the gate are out of reach of the initial explosion even if the gate is open. The explosion does reach the gate tiles, but no farther.
All you have to do is make one of the mimics in the upper chamber, which imitate your movements, step on the last trap door. That’s fairly easy. But if you try it, you’ll learn the reason: the entire area outside the gate is filled with spiders. The whole deal with spiders is that they’re invisible unless they move. Hiding crucial information like this is something of a violation of the spirit of the game as I understand it; presumably this is why spiders have been used so little after KDD. But they’re used here, and discovering them answers the question “Wait, I don’t see any monsters, so why are the green gates closed?” — something I didn’t even think to ask at first, so focused was I on obstacles rather than goals. (Mimics don’t count as monsters.)

The point is, letting the spiders out before the bombs kill them is disastrous. You can try to open the gate and kill them manually, but you’ll fail. So in searching for a safe spot to stand, you’re limited to the area inside the red gate. The only place inside the red gate that’s adequately shielded is inside the little crook in the upper left of the gate, and it’s blocked by both a green gate and a tar gate. So, that’s enough to give you goals! You have to get to the safe spot. On the way, you have to clear all the tar and mud, and kill all the monsters that spawn as a result of clearing all the tar and mud. You have to do this while keeping the mimics off that trap door and maneuvering around the bombs scattered around, which will blow if you accidentally stab them. And you have to do all this before the fuse burns down. This is not easy, but at root it’s just a matter of being careful and optimizing your movements, and that’s habit by this point in the game. The puzzle is essentially solved. You know what you need to do, and it’s pretty satisfying to finally do it.

On the way out of the room, you step on the Challenge scroll, which was inaccessible before. The challenge is: Don’t stab any tar. And it’s a beautiful moment, because it seems absolutely impossible.

It’s not just that it’s asking you to ignore a lynchpin of the puzzle. Lots of Challenges do that, and they don’t usually have the same impact. I think this is because most lynchpins aren’t quite as definite. Usually either you look at the puzzle and see a way to do it and it works, or you try it the wrong way a few times and can’t quite get it to work and start to think there must be a better way and look for one and find it. In the former case, the Challenge just tells you “Actually there’s another approach that would have worked too”. In the latter case, it tells you “The approach that you gave up on because it was too hard isn’t completely impossible”. But here? I didn’t merely notice a solution, I reasoned my way to one. Everything about it was a result of seemingly inviolable constraints. There is only one safe place to stand inside the red gate. To stand on it, you must clear all the tar. The only available means of clearing tar is stabbing it. And yet we are asked to not stab it. What this Challenge tells me is, “You think you understand this room. Actually, you do not understand it at all.” Solving it was a matter of re-examining my assumptions until I found one I could break.

References
1 Correction: Opening a gate under a fuse does not sever it. Only closing the gate under it does so. So that’s another reason to not pursue this strategy. Also, on looking at it again, it looks like some of the bombs inside the gate are within the blast radius of the bombs outside, and only shielded from them by the gate. So there’s that too.
[Added 29 May] No, never mind, all the bombs inside the gate are out of reach of the initial explosion even if the gate is open. The explosion does reach the gate tiles, but no farther.

JtRH: Goblin Territory

After hitting a rough patch in the mid-teen levels, I’m making progress at a pretty good clip again. I’m up to level 20 now, so Rooted Hold is basically within sight, or would be if we weren’t underground. But let’s go back a bit, to level 13, a goblin level, because that level has a pretty big gameplay shift. In the course of solving this level, you encounter the Goblin King, who’s kidnapped Halph and is holding him for ransom. The ransom is more than Beethro can afford, and ultimately the King admits that he knew this all along, that the ransom wasn’t the point. His real motivation is revenge for all the goblins killed by the Budkin family over the years and the ransom was just a way to make Beethro squirm. Beethro’s reaction is to charge into the goblins’ living areas and slaughter them all, much to Halph’s dismay — Halph, as established back when he was just one of many unnamed nephews in the outro to King Dugan’s Dungeon, thinks goblins are cool and is eager to make friends with them. And really, the goblins were never going to hurt him. Like all the dungeon’s monsters, they recognize that he’s special. But Beethro comes to his rescue anyway, regarding the goblins as creeps and his nephew as an idiot.

But he can’t do that right away. He passes through several roomsworth of goblins that are tantalizingly out of reach, while he’s isolated in a parallel passageway. And it all ends in the staircase down. Back when I played JtRH the first time, I wasted some time looking for the hidden passage or crumbly wall that would let me through to complete these unsolved rooms, but there was none. DROD is extremely friendly about letting you go back and solve things later, though. You can restore to any checkpoint in any room, and still keep the credit for everything you’ve solved, which is a good thing, because everyone misses most of the secret rooms on their initial descent. So I did eventually move on, and thus found that the levels actually double back after a while. You solve level 14, then on level 15 there’s a second staircase leading back up, which leads to another staircase to the area on level 13 that you couldn’t reach before. I said before that there are no stairs going back upward, that going down stairs just deposits you in a room without any stairs in it, and that’s true for KDD and the first half of JtRH. It stops being true here. Floors 13 through 15 aren’t just a sequence. They’re a space.

Now, most rooms in DROD are self-contained, but even KDD had some puzzles that span multiple rooms. Most obviously there was the infamous maze level, but there was also a sprinkling of things like rooms that you couldn’t solve when you entered them the first time, and instead have to cross to a different exit and then loop around and come back from another direction that you can solve it from. It seems to me that JtRH engages in this pattern a lot more than KDD did, and that the goblin subquest simply takes it to another level 1Literally.. This is a trend that The City Beneath will continue, as the rooms come to more and more represent places rather than just puzzles.

References
1 Literally.

JtRH: Enter the Mud

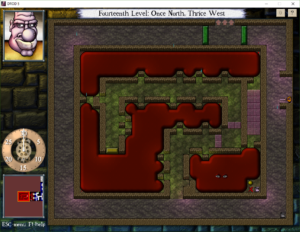
Level 14 of Journey to Rooted Hold is the first appearance of the Awakened Mud, which is sort of like inverse Living Tar. Where tar can be cut on its edges but not on its corners, mud can be cut on its corners but not on its edges. The result is that clearing mud is fundamentally simpler. Cutting away a corner generally creates a new corner adjacent to the old one, so in the absence of walls or other obstacles, you can clear any mudshape by shaving it away in layers. Thus, to avoid being trivial, mud puzzles tend to use walls or other obstacles.

When there’s something you need to reach in the middle of a large pool of tar — usually a Tar Mother — all you need to do is reach the pool’s edge and you can slice your way through the thick of it and straight to your objective. You can’t do that with mud. The only way get to the middle of a mud pool is by removing enough mud that it isn’t the middle any more. Relatedly, if tar growth leaves you completely surrounded, you can cut your way free, but in mud, you just get stuck, immobilized by stuff you can’t damage. In short, mud behaves very differently from tar, and has a very different effect on puzzles.

JtRH takes a clever approach to illustrating this. Level 14 is basically just a selection of tar puzzles from King Dugan’s Dungeon turned upside-down and with the tar changed to mud. I don’t remember this from the first time I played through JtRH. Maybe I noticed at the time and just forgot about it, or maybe I’m only noticing this time around because I played KDD so recently. Regardless, the impact of recognition here is the one good reason I’ve seen for playing KDD before JtRH. It must be very strange to see the mud versions of these rooms first, because the conversion leaves in elements that don’t make sense, design-wise. For example, there’s one room that, in its original form, has a door that’s opened by an orb that’s very difficult to reach, because it’s in a tar-filled area that’s only exposed at its corners. In the mud version, the orb is trivial to reach, but also kind of pointless, because both sides of the door are also trivial to reach.

What really tickles me is the way the game builds story around all this. Overheard conversations and discarded memos depict a feud between the Tar Technicians and the Mud Coordinators, the latter being a recently-formed group that’s regarded by the former as upstarts peddling an inferior imitation. And the Tar Technicians have a point. Mud is inferior to tar from pretty much every perspective. As a defense, it’s more easily defeated. Because it’s so easily cleared, it has less potential for interesting puzzle design. Because you have to peel it away in layers instead of just plowing through the middle, it’s more tedious for the player. The reuse of old tar puzzles doesn’t just illustrate the differences between the two substances, it reinforces the “inferior imitation” idea, as if the Mud Coordinators didn’t have any new ideas of their own. From one overheard conversation, we learn that the reason that the rooms of Level 14 are all upside-down from the originals is that the architect was holding the blueprint the wrong way up, further emphasizing the sense of incompetence.

This is stuff we didn’t see in KDD. When tar was first introduced, it was just a new puzzle element, one of those things you find in dungeons. In JtRH, new elements have stories associated with them, with characters and conflicts and meaning. And old elements gain these things retroactively.

JtRH: Tar and Parity

A couple of levels on, and I’m once again finding myself spending a lot of my time clearing tar, not just because of those tar gates, but because clearing a room completely of tar has become a fairly common subject for Challenge scrolls. The mechanics of it are seeping into my dreaming mind, occupying my idle thoughts. Let me get some of this out in words.

Tar lies in multi-square puddles, which you can cut with your sword along any edge, except at the corners, which are vulnerable only to explosions — which is to say, invulnerable in rooms without bombs, which is most rooms. To remain stable, the puddles have to have a width of at least 2 in all places, both north-south and east-west; any square of tar that lacks a neighbor in either dimension will break off and start chasing you. Thus, the smallest stable configuration of tar is a simple 2×2 square. Since this puts all four tiles at a corner, such a square cannot be cleared. It’s the basic kernel of most unclearable tar shapes: if you can clear everything except a 2×2 square, you were doomed from the start. There are other invulnerable shapes, but they basically amount to multiple 2×2 squares stuck together by shared corners.

The basic clearable tar shape, on the other hand, is the 2×3 rectangle. Poke that in one of its vulnerable longer sides, and the remaining five squares break into monsters. This can be generalized. Given a 2xn strip, the only things you can do are cut off two rows at one end, or remove one row in the middle and split it into two pieces. If n is odd, you can cut off two rows repeatedly until it’s 2×3. If n is even, then it will still be even if you cut off two rows, and splitting it in the middle will always create one strip with an odd length and one with an even length; thus, you’re always going to wind up cutting it down to a 2×2 square at the end. So strips of this sort are solvable if their length is odd and unsolvable if their length is even. Many rooms have a checkerboard pattern on the floor, allowing you to tell odd from even at a glance.

Similar logic, which I’ll leave as an exercise for the reader, shows that a rectangle is solvable if and only if it has at least one odd side. It’s basically a matter of parity, an odd-or-even property that you can’t change with your sword, except with “odd” and “even” confusingly swapped: an odd length represents even parity and vice versa. That is, by assigning “even” to odd lengths, an nxm rectangle has even parity if either n or m has even parity, just as the product of two integers is even if either of them is even. It works out this way because of how splitting a rectangle into two pieces requires removing a row. When you split a rectangle in two, the pieces will have similar parity if the original had even parity, and opposite parity if the original was odd.

At any rate, all rectangles with even parity are solvable, but things get more complicated when we move beyond rectangles. You can have lumpy shapes with corners in inconvenient places that keep you from making the cuts you want. If you can reduce a shape to two separate 2×2 squares, it had even parity, but might still have been unsolvable. Odd parity is always unsolvable, though, no matter the shape. Assuming that Challenges are never completely impossible, it’s therefore safe to assume that the parity of any completely inert tar pool you’re supposed to clear will be even. But if there’s a Tar Mother in the room, making the tar expand at regular intervals, it’s possible for the parity to change. Thus, when you kill the Mother, it’s imperative to make sure that the remaining tar has the right parity if you intend to clear it all. I have no better way to do this for wiggly shapes than to attempt to clear it and see if it I wind up with a 2×2 square left over. But if I do, at least I know better than to keep trying from the same point.

« Newer PostsOlder Posts »