JtRH: Ironies

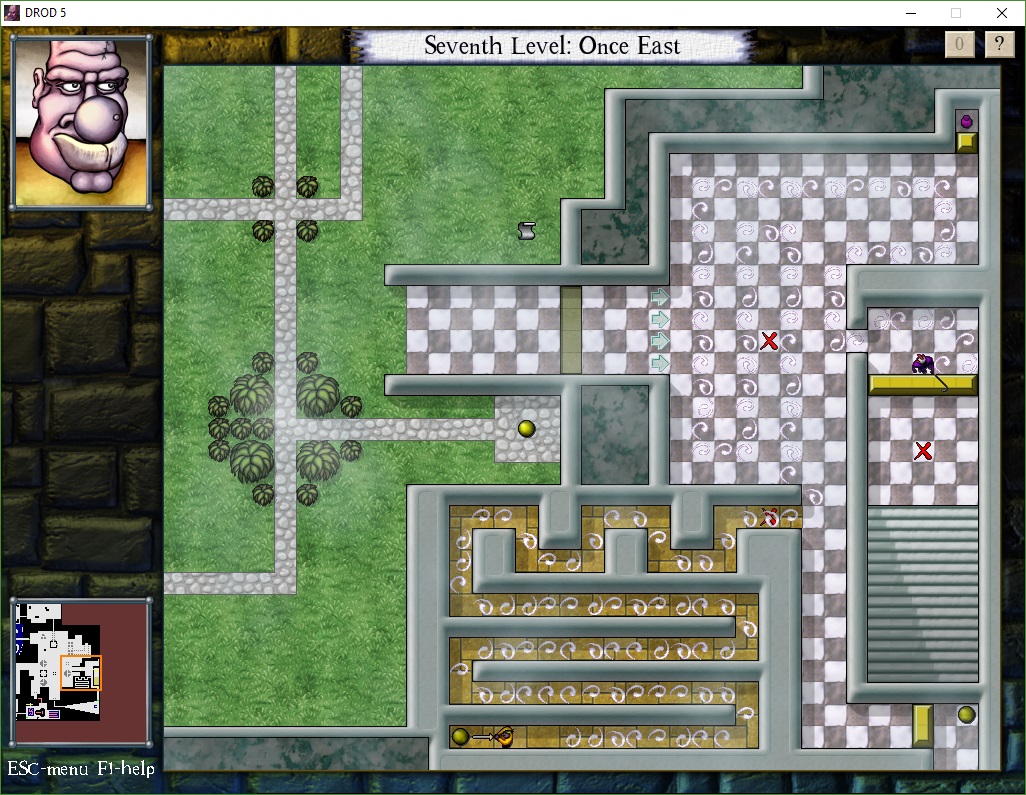
It’s only after I killed the Slayer in L7:1E using advanced techiques that I found out that there was a much easier way to do it, and that it was one I really should have noticed, because it’s basically just the exact same trick I described in the post where I complained about being unable to figure it out, just turned backward. Instead of forcing the Slayer to step on the force arrows, you walk on them yourself while approaching him. Done right, the effect is the same: the force arrow prevents the slayer from simply stepping onto your square, letting you make moves he doesn’t know how to counter.

Still, I’m past that, and galloping through the rooms at a pretty good clip again. And that means I’m well into I-don’t-remember-this-part-at-all territory. There’s a plot point on level 9 that I think is worth describing.

First, it should be noted that even though the title is Journey to Rooted Hold, journeying to Rooted Hold was never Beethro’s intention. He just wanted to get a look at what was behind that unopenable door in King Dugan’s dungeon, but then he had to go find Halph, and then he had to go down stairs a few times to escape the Slayer, and before you know it, he’s down at level 9 with no way back. There, he has an idea. He’s noticed that the levels have been heading generally southward for some time — that is, the stairs down on each level have been south of the starting location 1As in the first game, there are usually no stairs leading back up. You just go down some stairs and get deposited in a room in the next level.. So he figures they’re going to be under the neighboring city of Blorn pretty soon, and remembers a similar unopenable door in Blorn’s sewer system. Blorn isn’t where he wants to be, but at this point, anyplace where he can escape the dungeon with Halph in tow is good enough for him.

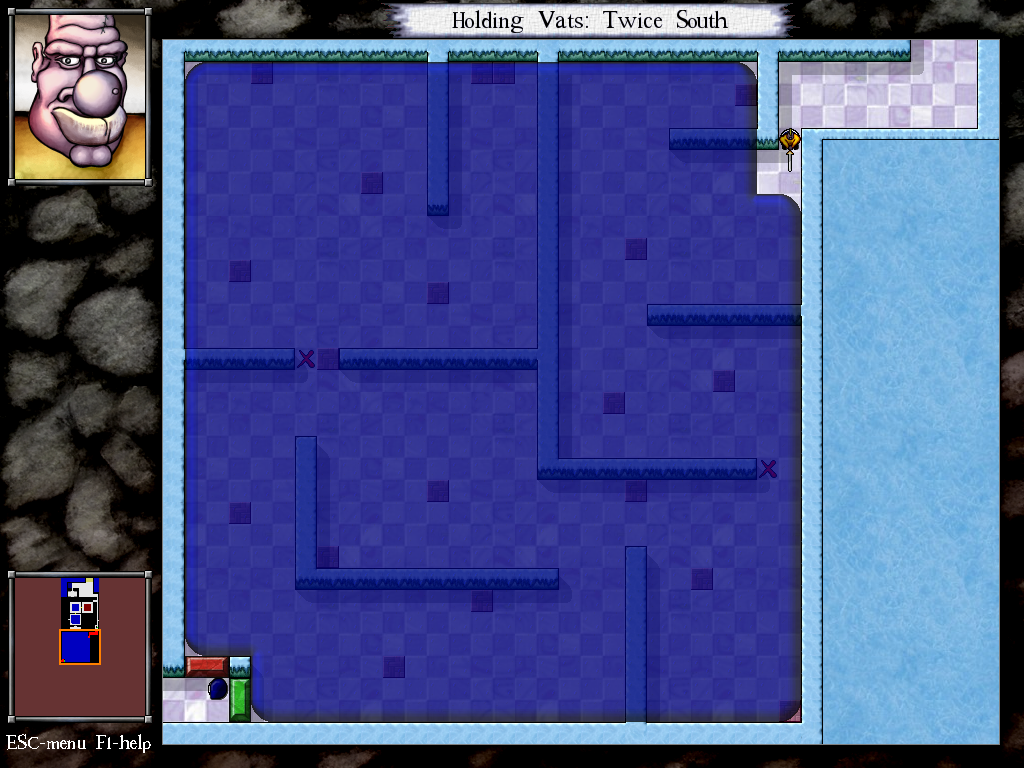
So you find the exit to the Blorn sewers, clearly labeled. It’s in the same room as the down stairs. But the Slayer is there waiting for you, and it’s clear what’s going to happen: Just at the point where Beethro is about to escape, he’s going to have to go down another floor instead. The irony of this is that the whole reason the Slayer was dispatched in the first place was that Beethro was unwilling to leave the dungeon. Now that he’s found Halph, he’s positively eager to leave, but the Slayer prevents it.

It strikes me that most of the plot of the game is driven by character flaws. Halph’s headstrong lack of cooperativeness draws Beethro down. The Slayer’s pride, his unwillingness to give up on a quarry even when the original purpose is lost, keeps him there. Even the Negotiator arguably takes some blame for the sense of superiority that makes her unwilling to listen to Beethro and therefore not actually very good at her job. Beethro himself is of course the hand that sets the dominoes in motion. His motivation? Curiosity, I guess. But if we want to peg it to a flaw, it’s the lack of consideration that led him to indulge that curiosity on a day when he was looking after Halph.

References
1 As in the first game, there are usually no stairs leading back up. You just go down some stairs and get deposited in a room in the next level.

JtRH: Last Minute Subject Change

No progress on the JtRH L7:1E Challenge. I noticed that Steam’s description of the “kill the Slayer” Achievement is “(JtRH) Kill 39th Slayer in any room except L7:1E, L22:3N2W or L25:2W”, specifically excluding the room I’m stuck on, as well as the room on the final floor where the Slayer is supposed to die. I figure this could mean that completing the L7:1E Challenge requires killing the Slayer after all. Or it could mean that doing things the normal way and getting the invisibility potion makes killing the slayer way too easy to count as a Challenge. Regardless, I spent some time trying to kill the Slayer, but had no success.

At this point, I’m ready to openly ask for help. I’ve tried looking online already, but the old Caravel forums where the Challenges were first mooted don’t explain how to do them, and the new Steam forums are pretty thoroughly useless for anything other than tech support, and the game is obscure enough that just googling for help doesn’t yield much of anything other than the Caravel and Steam forums. In fact, the top hit for “drod L7:1E” is my own previous blog post on the subject, which is oddly embarrassing.

The Caravel forums turn out have some good general advice on killing the Slayer, though. The first time I managed to do it in a room where you’re not supposed to, I managed it by making the Slayer walk onto a force arrow. Getting within killing range of the Slayer makes him counter your every move in ways that are often symmetrical about a pivot: you tilt your sword this way and he tilts his the opposite way, you move south and he moves north, more like you’re dancing than fighting. The force arrow broke this symmetry, allowing me to get close to him without him being able to do his usual counter. But it turns out that special-terrain tricks like this aren’t really necessary. All you really need is walls in the right configuration — an interior corner with a single block jutting out will do. Alas, L7:1E has no such thing.

…Is what I was in the middle of writing when I suddenly found some threads on the Caravel forums about more advanced Slayer-killing techniques. It turns out that there are Slayercidal dances that require only a straight wall and enough empty space. It took some finagling to get Beethro and the Slayer into the starting positions for such a dance, but it was quite possible within the constraints of L7:1E. So now I get to continue! Yay!

JtRH: Clog Monsters

Since I’m still stuck on the 7F:1E challenge, let’s take a brief look at what’s happened on the floors I’ve glossed over. A couple of new monsters were introduced — well, not new to me, and not new to people playing Journey to Rooted Hold as DLC for Gunthro and the Epic Blunder, which also had them, but they were new once.

Floor 5 is the first appearance of the puffy marshmallow-like Wubbas, an entirely new concept for a monster in this game: they don’t attack you, but neither can they be attacked. Your sword just passes right through them without harming them. As such, they’re not counted as monsters for the purpose of conquering a room. They’re dangerous all the same — it’s just a danger of being surrounded and immobilized rather than killed. Wubbas tend to come in quantity, and they chase you like anything else. Their one weakness is that they’re a little stupider than most monsters, and get stuck on obstacles easily. The standard movement algorithm for most monster types is:
1. If the player avatar is due north, south, east, or west of you, just try to move in that direction.
2. Otherwise, try to move diagonally towards the player.
3. If there’s an obstacle in the way of moving diagonally, try to move around it north or south, whichever brings you closer to the player.
4. If you can’t do that either, try east-west.
(Some monsters, such as Goblins and Wraithwings, embellish this with special behavior when they get close to you, but use the standard algorithm from a distance.)
Wubbas omit steps 3 and 4. If they can’t just move straight towards you horizontally, vertically, or diagonally, they give up. Just as they try to block your path, so are they especially vulnerable to having their path blocked. In some rooms, though, this serves to split the Wubbas up, so they can keep coming at you from multiple directions as you move hither and thither.

Floor 6 introduces Rock Golems, which, I only realize on preparing to write this, are essentially a variation on the same theme as Wubbas: things that clog your path and don’t go away. The mechanics are different, though. Rock Golems can be killed (and can kill you if you’re careless), but once you kill them, they turn into impassable piles of rock. So where Wubbas are all about outpacing the herd, Rock Golems are best handled by luring them one by one to an open area and murdering them where their corpses won’t cut off any passageways. (Unless you want to cut off a passageway to keep the Slayer away or something.) Curiously, they have the same diminished movement algorithm as the Wubbas, the better to get them stuck on each other’s remains, for good and for ill — after you’ve led a few of them to your chosen killing grounds, it can become difficult to get more down there.

JtRH: L7:1E

Time for a confession: Although my posts about DROD stalled last year, I didn’t really wait four months after finishing King Dugan’s Dungeon to start playing Journey to Rooted Hold. I started playing it from the beginning back in December, and got all the way to the end of the 7th floor without posting anything here about it. Then I got stuck. And now, having started from the beginning again, I’m stuck in exactly the same place.

“Stuck” isn’t really the right word. I can continue to the 8th floor any time I want. In fact, I have already done so, only to reload back into floor 7. What I’m stuck on is one of those Challenge scrolls. To date, I’ve been meeting every Challenge I find — as I noted before, this is the main part of the remakes that’s new to me, so it seems a shame to skip them. But this one Challenge has been a lot harder for me than any other I’ve seen.

The overall theme of the seventh floor is puzzles involving invisibility potions and/or evil eyes — in particular, it makes puzzles out of the non-obvious fact that being invisible can be a liability, because monsters that can’t see you won’t chase you, and if they’re not chasing you, you can’t manipulate them into going where you want. The Slayer makes one appearance on this floor: after the repeated failure of his usual approach, he’s decided to just wait for you by the exit stairs. The stairs are near the floor’s start, but access to them is limited by an orb at the end of a long, winding hallway. If the Slayer follows you into that hallway, there’s no way to get back out. Thus, you need to be invisible, so he won’t follow you. There is an invisibility potion in the room, but you can only reach it if you enter via an alternate route in the south, which only opens after you conquer all of the other rooms in the level.

Or that was the intent, anyway. Someone figured out how to open the stairs without going through the alternate passage, so now it’s a Challenge. As the challenge scroll notes, you can skip the entire rest of the level this way.

Now, I can see only two possible routes to this goal. One is to kill the Slayer, but I don’t think this is likely. The room lacks features that can be exploited for this, and besides, would they really include both a Challenge for killing the Slayer in any room and another Challenge that requires killing the Slayer in a specific room? The other possibility is to take advantage of the Slayer’s Wisp. The Wisp is the thing that the Slayer uses to find a path to the player. It moves at one square per turn, leaving a trail of swirlies as it goes, and while it’s moving, the Slayer himself doesn’t move at all. So if you could lead the Wisp on a sufficiently long and winding path through the room, it would send the Slayer on a long and winding path while you escape from the long and winding hallway. I’ve managed to get within a hair’s breadth of making this work, but I assume that was the intent behind the room’s design: to make this approach almost but not quite workable.

I feel there must be some trick to making the winding path approach work. Some insight that I’m missing. And that’s largely why I’m still working on the problem. Most of the Challenges are of the form “Forget about the lynchpin, there’s an incredibly fiddly solution that you can do instead.” But this Challenge may well be introducing a lynchpin of its own.

JtRH: 39th Slayer

I’ve mentioned JtRH‘s Slayer before, in my post about The City Beneath‘s Slayer trainees. There, I described Slayers as “kind of like the Terminator: perfect killers, relentless and unstoppable, something to be escaped from rather than defeated”. This time through, bearing that in mind, I’m struck by how different 39th Slayer’s attitude is from your typical dogged pursuer. Usually such adversaries are depicted as grim, dour, and driven by single-minded determination, but 39th Slayer carries a sense of joie de vivre. He just seems to really enjoy his job and approach it with pride and relish and even merriment. Slaying delvers is, we will eventually learn, literally what he was made for, and he takes pleasure in fulfilling his purpose. His voice is deep and echoey, but has a hint of a laugh in it; when he taunts Beethro, it almost seems flirtatious.

But this attitude is based on confidence. When we first meet him, he makes a point of Beethro’s predictability, telling another NPC that you’re going to walk into a trap — which you then do, because it’s the only way forward. He even invites a class of Slayer trainees to observe him slaying you. Your repeated escapes are a clear embarrassment to him, but he tries to maintain a facade of confidence all the same, assuring you that your demise is inevitable, as much to convince himself as you.

Mechanically, his role is to chase you. Rooms that would otherwise be simple are complicated by your need to keep running away from him. Also, it should be understood that, like Halph, he doesn’t appear in most rooms, and that when he does, he usually enters the room after Beethro, the better to chase you. So the typical pattern is: You enter a room, you look at what’s in it, you formulate a plan for killing all the monsters, you step forward to start executing that plan… and then the Slayer comes in, adding that extra complication and forcing you to rethink everything.

Occasionally — occasionally — you can use the Slayer to your advantage. For all that he calls Beethro predictable, he’s the one whose behavior is completely deterministic. Sometimes you can manipulate him into killing monsters for you by getting the monsters between you and him. This is particularly useful when a Challenge constrains your ability to kill stuff yourself.

I said before that the Slayer in JtRH is unkillable until the ending, where it takes a whole roomful of explosives to do him in. This turns out not to be the case — the more dedicated Droddists figured out ways to do it that the designers didn’t intend, kind of like how Ultima players figured out unintended ways to kill Lord British. Killing him doesn’t affect subsequent rooms, mind you, because the authors didn’t plan for it happening at all. In a way, it’s surprising that killing him causes him to die at all. I mean, it’s not like your sword necessarily has to affect monsters; Serpents aren’t affected by your sword. But I guess he’s just inheriting the “die” behavior from the more general monster class, which the programmers didn’t originally see a need to override. In the remake, killing the Slayer prematurely is a Challenge (and thus, on Steam, an Achievement) — the only Challenge that’s not bound to a specific room. And it’s a Challenge that I’ve completed. It turns out that the only thing preventing me from figuring out how to do it was that I thought it was impossible. Once I knew it could be done, I knew to look for ways it could be done.

DROD: Journey to Rooted Hold

Let’s get back to that much-delayed DROD replay, shall we? The second game in the series is Journey to Rooted Hold, and the most immediately striking thing about it in contrast to the first game, apart from the increasing sophistication of the puzzles, is that it has characters, and that the characters are an important part of the game. This is apparent from the very first room, where Halph shows up.

Halph is one of the few major recurring characters in the series. He’s the nephew of Beethro, the player character, and most of the rooms where he shows up use him for his unique puzzle-solving mechanics. Beethro can give Halph a few simple orders: “Follow me”, “Stay here”, and “Open this door” (which Halph does by striking the associated orb, which might be in a place Beethro can’t get to at the moment). It’s pretty similar to the commands you can give to your followers in the Oddworld games, come to think of it, even if the door-opening mechanism was a little different there. But where Oddworld made things complicated for the player by assigning a chord of controller buttons to each utterance, JtRH cleverly manages without introducing any new controls at all. To toggle Halph between follow mode and stay-put mode, you just nudge him by trying to walk into his tile. To tell him to open a door, you try to walk into the door. Trying to walk into stuff is something that was already possible, but didn’t do anything other than waste a turn until Halph showed up.

Even though ordering Halph around can make for pretty good puzzle content, I think I prefer him as a character when he’s not obedient. That’s his main role in the story: running off into other rooms when Beethro tells him not to, petting the roaches when Beethro says to back away, taking that one crucial step onto a force arrow that makes it impossible to get back to Beethro even if he arbitrarily decides to start being obedient again. This makes him a terrific foil. Beethro, as we know from his puzzle solutions, is a planner, and Halph leaves his plans in shambles. Beethro didn’t even want him in the dungeon at all — at the beginning, he instructs him to just wait by the exit — and the main impetus for delving deeper in the beginning is just chasing after Halph to bring him back safely to his parents — something that hasn’t yet happened in the games I’ve played. And it isn’t just Beethro’s plans that he lays waste: Halph shatters his preconceptions, too. Monsters don’t attack him, which calls the whole idea of “monsters” into question. Beethro solves complicated monster-slaying puzzles to get from room to room, but sometimes Halph just shows up ahead of him and can’t explain how he got there.

Apart from Halph, all the other characters are citizens of the Rooted Empire. As early as the first floor, you start encountering weird gray-skinned guys with silly voices, who just hang out and watch you solve puzzles and comment on your technique and whether it meets their personal standards. These guys were the equivalent of Challenge Scrolls before there were Challenge Scrolls. There are Challenge Scrolls in the same rooms now, of course, formalizing the whole thing, but the watchers are still there, kind of redundant but preserving a touch of character. On the second floor, you meet the Negotiator, who sits behind a grand desk and tries to persuade you, in a lengthy cutscene-like dialogue, to leave the dungeon voluntarily before the Slayers get involved. This time through, I noticed that the Negotiator basically lays out what we eventually learn to be the main overarching conflict driving events in the DROD setting, but does so in long-winded terms that the first-time player doesn’t yet know enough about the setting to understand.

Floor 3 introduces 39th Slayer, who’s a big enough part of the game to get a separate post of his own.

DROD: Giants

drod-giantsBy now, I seem to have pretty much left the City behind. The story has taken me to the forgotten spaces below the city, home to the Stone Giants.

Stone giants are what would be called “Large” in Dungeons & Dragons. That is, they have a 2×2 footprint. Although they look more threatening this way, the larger size doesn’t make them more more powerful or even let them move faster. Quite the reverse: it limits their mobility. There are puzzles to be made from this weakness, by forcing the player to either take advantage of it (ducking into narrow tunnels to escape them), or overcome it (herding them through difficult passages). When hurt, stone giants break apart into four one-tile stone golems (a familiar monster from JtRH), leading me to suspect that they’re made of the same kind of rock as seen in Asteroids. Golems collapse into impassible rock when slain. Since obstacles of this sort are the giants’ greatest weakness, it’s like the giants carry within themselves the seeds of their own downfall. (Much like the Rooted Empire itself, it seems. There’s some kind of parable about hubris and data storage going on back in the story. More about that later, probably.)

The reason I’m taking the time to write about the giants in particular is that this is the first new creature shape in The City Beneath. The original DROD had three shapes. You had your standard one-tile creatures, such as roaches, goblins, wraithwings, and evil eyes. You had tar, which formed amorphous multi-tile blobs, at least two tiles thick in all places. And you had serpents: one tile wide, arbitrarily long, moving in right-angle wiggles like in the classic Worm. Journey to Rooted Hold introduced several new monsters, including new kinds of serpent and tarstuff, but added only one more shape: standard-plus-weapon, a shape used for armed guards and the Slayer. In a sense, even that wasn’t really a new shape, because that’s Beethro’s shape.

Well, The City Beneath gave us another new serpent and another new tarstuff, but only at this rather late stage of the game do we start seeing giants. I wonder why? Perhaps the designers felt that the stone giants had limited potential for reuse. Or maybe not; if you’re introducing a new element on nearly every level, something has to come in near the end.

DROD: Slayers

drod-slayersJourney to Rooted Hold introduced a recurring antagonist: the Slayer. Slayers are kind of like the Terminator: perfect killers, relentless and unstoppable, something to be escaped from rather than defeated, at least until a climactic confrontation with a lot of pyrotechnics. They’re created to deal with nosy delvers like Beethro who threaten the security of the Empire. One starts pursuing him early in the game, and keeps on appearing every so often right up to the end.

The key thing about the Slayers is that they’re always armed with a vicious hook that has the same reach as Beethro’s Really Big Sword, and they always points it towards Beethro. This means it’s absolutely impossible to kill them directly.

Now, The City Beneath has Slayers. They’re even important to the overall plot. But this time around, they’re not so hard to kill. The game’s excuse for this is that the ones attacking you now aren’t full Slayers yet, but Slayer trainees. Their hope is that if they kill you they’ll be allowed to fill the vacancy left by the death of the Slayer from Journey to Rooted Hold.

The interesting thing is that the trainees don’t seem to be governed by a different algorithm than the full Slayers. The only reason they’re easier to kill is that they show up in rooms where the terrain is against them. The most extreme example appears in a room containing lots of hot tiles. Hot tiles are new in TCB. Anything (be it monster or Beethro) that stays on a hot tile for more than a turn burns up. Hot tiles are an especially stupid place for Slayers to be, because they’re always pausing in their pursuit to reorient their hook or send a wisp to find a path to Beethro. (These pauses are the basic weakness that allowed Beethro to repeatedly escape from the Slayer in JtRH.)

Eventually, Beethro has to apply for a job in order to be allowed deeper into the city. He applies for the job of Slayer, because he knows there’s a vacancy, and because it’s really the only thing he’s qualified for. To get the job, he has to defeat five other Slayer candidates at once. This is one of those staggering moments — five at once! We spent an entire game fighting one. But it turns out that five Slayers aren’t that much harder to defeat than one, owing to the fact that they all act pretty much the same. If they were smart enough to coordinate their attacks, they would be formidable, but they don’t. Herding them all to the same place at once is a little tricky, but really just requires persistence, not cleverness.

Not long after this, Beethro has to kill 255 Slayers at once. Not quite through the same means, though.

DROD: User Interface

drod-doorsI’ve come to really like the improvements that have been made to the DROD user interface. Basically, each episode makes more information available.

For example, one of the basic mechanisms in DROD is orbs that open, close, or toggle gates when struck. The City Beneath also has pressure plates that do the same when trod on (which means you can trigger them from a distance by inducing monsters to walk over them). But the orbs and pressure plates are not necessarily near the gates they affect. In the original DROD, if there were multiple orbs in a room, the only way to know what they did was to try them out, which you could only do for the ones that are acessible at any moment.

Well, ever since Journey to Rooted Hold, you can click on these controls to highlight the doors they affect, in colors indicating whether it opens, closes, or toggles each door. I didn’t use this feature much when I learned about it, but it’s become a very big deal. One of the basic DROD room patterns is making the player hit a series of checkpoints in a specific order by giving each an orb that unlocks the door to the next. With the new UI, I can know in advance the order I’ll have to hit them in, and plan accordingly. Even in rooms where all the orbs are accessible from the beginning, it’s nice to not have to try them all out (and possibly render the puzzle unsolvable in the process because you let the cockroaches out too early or something).

Once they implemented this click-to-highlight system, the designers started using it in various other ways, such as clicking on an Evil Eye to show its line of sight, or (new in The City Beneath) clicking on a bomb to highlight the area that will be affected by its blast. This was never secret information. All bombs in the game have the same blast radius. So displaying that radius on demand is just a convenience. You know something? Conveniences are nice.

I actually didn’t notice most of these features in Journey to Rooted Hold, which wasn’t as aggressive about pointing them out as the new episode, but there was one enhancement that was hard to not notice: it added a clock to the screen whenever there was a timed event pending. Mainly this meant timing the spawn cycle of Roach Queens and Tar Mothers, both of which cause new stuff to appear every 30 turns. Knowing exaclty how soon that’s going to happen is often crucial, and it was easy to lose track when playing the original DROD.

The general principle here is that providing easy access to crucial information helps the player, by making the process of solving the puzzles easier, but doesn’t actually make the puzzle itself easier. A subtle distinction, perhaps, but an important one, and one that’s illuminated by my recent experiences with Roberta Williams’ Time Zone. Williams chose to make things inconvenient for the player, making you reload saves and do things over again because you used the wrong weapon or brought the wrong selection of objects into the endgame. She chose this, I think, because she was trying to create a difficult game, and the understanding of the time did not differentiate between difficulty in solving a game and difficulty in playing it.

The designers of DROD have a better idea of what their gameplay is about. It’s not about keeping secrets from the player. It’s about applying known rules in complex and novel ways.

drod-tar1It’s interesting, then, that they still choose to retain the possibility of hiding information in some ways. Let me explain: I’ve just reached the point in The City Beneath where the Living Tar makes its appearance. Living Tar, and its variant Awakened Mud, form DROD‘s version of ooze monsters. In its simplest state, tarstuff (the word applies to both forms) lies in inert pools covering multiple tiles, not crossable and only partially vulnerable to attack: Tar is invlunerable on its convex corners, while Mud is invulnerable everywhere but its corners. Either must be cleared away one tile at a time.

Now, until cleared, tarstuff conceals any terrain features in the tiles it occupies, including orbs, pressure plates, gates, and even walls. This is significant information-hiding. The original King Dugan’s Dungeon had some puzzles that relied on tarstuff’s concealing properties. For example, there was a maze completely covered in tar, which you had to cut carefully lest you wind up with an invulnerable tar corner blocking the path you needed to take. This isn’t really in the DROD style as I’ve described it above, but it’s typical for the first game in a series to have a few klunkers.

drod-tar2The City Beneath provides a way to see what’s under tarstuff, but it isn’t a user-interface feature like the other things I’ve been describing. Rather, there’s an in-game “token”, a special tile type that effectively gives Beethro X-ray vision when activated, rendering all tarstuff translucent.

I can think of three possible reasons why tarstuff visibility isn’t handled through a simple click like the other new information features. First, it could be that there will at some later point be puzzles that rely on concealing information with tarstuff. I hope this isn’t the case, because it’s difficult to imagine the result being anything more than a guessing-game, and I think the DROD designers are past that now. Second, it could be that the designers wanted to preserve the ability to play levels created in the older engines without drastically altering the play experience. I don’t know that that’s a great priority for them, though: surely some of those old levels are drastically altered by the ability to click on an orb to see what it does. Third, it could just be the difficulty of creating a user interface to deal with it reasonably. If you click on tarstuff to see under it, and you click on orbs to see what they affect, how do you see what’s affected by an orb concealed by tarstuff?

DROD: The City Beneath

drod-cityHaving played the oldest games on the Stack, it’s meet that we now continue with the newest: the first game on the Stack to be released after I started this blog. DROD: The City Beneath is a game I’ve been looking forward to.

I suppose I’ll have to explain the DROD phenomenon a little, because it’s way too indy to attract any significant media attention. Known to connoisseurs but not sold in stores. The word “cult” probably belongs in here somewhere. Originally known as Deadly Rooms of Death, it’s a turn-based puzzle game in the dungeon-crawl idiom, its gameplay somewhere between Gauntlet and Sokoban. The goal is simple: kill all the monsters. A single blow from your Really Big Sword will destroy any living thing in the square it touches. The controls are also simple: use the arrow keys to move one square in any direction, and the “Q” and “W” keys to rotate 45 degrees, swinging your Really Big Sword 1Yes, it has to be capitalized like that. Be grateful I have enough self-control to refrain from adding a trademark symbol. as you do so. It uses these two simple things to create complex puzzles. The basic way the game works, from the first episode onward, is that most levels introduce a new monster type or terrain feature and then exploit its puzzle potential in every imaginable way. When its potential is exhausted, you proceed to the next level and get a new puzzle theme to explore exhaustively.

The first game had a simple storyline involving Beethro Budkin, dungeon exterminator, being hired to clear out the levels below the castle of one King Dugan. It left one hook for future adventures: one room had a door that could only be opened from the other side. The sequel, Journey to Rooted Hold, had Beethro getting through that door and discovering to his shock and surprise that the game had a plot. It seems that the accretion of additional levels to the bottom of Dugan’s dungeon in successive versions of the original game isn’t just a natural phenomenon, but the activity of an underground empire founded in the pursuit of knowledge — a hive of secrets, seemingly pointless activity, and endless bureaucracy. NPCs were introduced, Beethro’s nephew Halph (who assisted Beethro with some of the puzzles) started acting creepy and disappeared, a voice from a vast pit muttered cryptic nonsense. The City Beneath, the new episode, picks up where that left off, with Beethro arriving at the empire’s capital. The city is a hub of pure scenery and NPC interaction where Beethro isn’t even allowed to use his sword, with puzzle areas around its periphery. In a way, this hub section reminds me of Knytt, an experimental work that’s more art object than game.

That’s the basics. More details will follow, when I’m not in a hurry to get back to playing it. This is a real 5 AM game.

References
1 Yes, it has to be capitalized like that. Be grateful I have enough self-control to refrain from adding a trademark symbol.

« Newer Posts