TCB: Swordlessness
 Comments(1)
 I’ve talked about this before, but it’s impressing me anew: in comparison to other DRODs, it’s striking how much of The City Beneath is spent without using your sword. It’s not just the time you take exploring the city proper, where you’re forced to keep your sword in its sheath lest it be devoured by oremites. It’s also the way that the new game elements provide other things for the puzzles to be about. Take the rafts and floating platforms, which are really the same thing in two different contexts. A raft or floating platform is a contiguous group of floor tiles that move under your control when you’re on them, provided that there’s nothing in the way. 1That’s a bit of a simplification, but I’ll spare you the details. Once that’s in the level designer’s toolkit, they can use it to make polyomino assembly puzzles that you solve from the inside. You don’t need a sword for that.
In a weird way, it reminds me of Portal 2. There was reportedly a point in the development of Portal 2 when the developers were seriously contemplating leaving the portal gun out, because they had a number of other novel mechanisms to replace it with, such as magic paint. But they wound up including the portal gun as the means by which you interact with the other novel mechanisms. TCB sort of does it the other way around: using your sword is the goal, the thing that the other puzzle-solving is done in service of. But then, the game also introduces new ways to kill things without using your sword, such as leading them onto hot tiles, or knocking out the supports of a bridge, or letting them step on your raft and then pulling it out from under them.
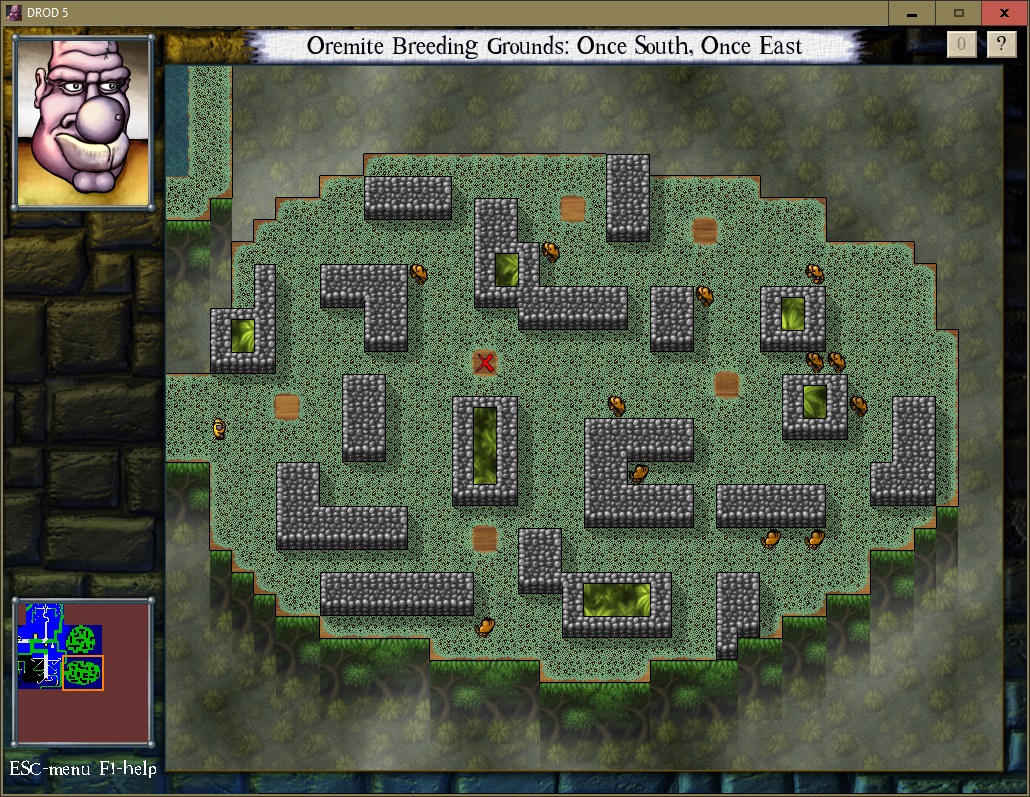 I mentioned oremites. When you first learn about the city’s oremite infestation, it seems like they’re nothing more than a tongue-in-cheek in-game excuse for the narrative decision to keep Beethro from killing important NPCs. But fairly late in the game, there’s a level called “Oremite Breeding Grounds”. Here, most of the floor is covered with oremite nests, except for a few tiles — and consequently, those are the only tiles where you can draw your sword. The puzzles are thus all about getting monsters over to the places where you can kill them, with enough time to turn to face the right way once you get there. I just love how it turns what seemed like a throwaway joke into a mechanic that produces puzzles, and I especially love how long it waits between introducing the concept of oremites and paying it off in this way.
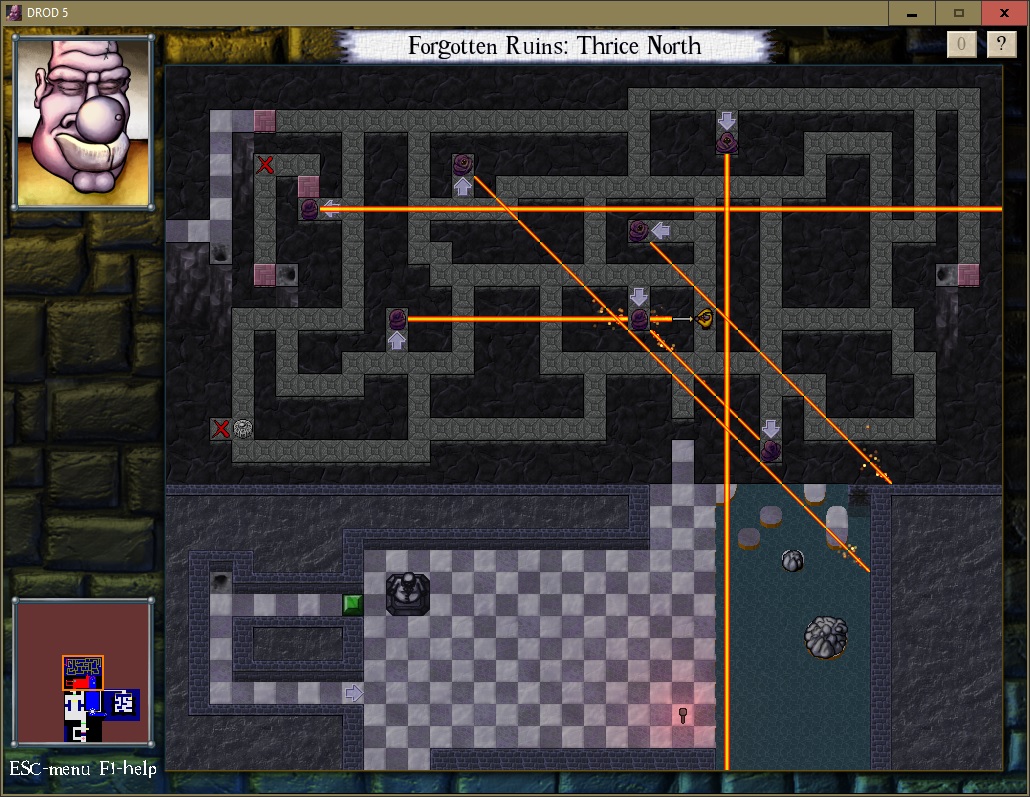 I mentioned the sequence where you play as the Negotiator, who doesn’t even have a weapon, and has to kill monsters by controlling Fegundos. There’s a second such interlude where you control a goblin, who doesn’t have a sword, but who’s capable of killing things anyway (as we know from the puzzles where Beethro fights goblins). This is the sequence that introduces Aumtliches, the Empire’s latest vat-grown weapon of war. An Aumtlich’s eyes emit glowing, sparking beams that paralyze you if they touch you, leaving you able to turn in place but not able to flee. There’s a sense of powerlessness there that’s worse than simply being killed outright, and the player learns to fear the sound effect that accompanies getting stuck in the beams. And it all leads up to the moment when you get Beethro back, and have a sword again. To emphasize the importance of this, Beethro has to surrender his sword to be allowed into a military encampment just before the goblin sequence, and it’s only returned after that’s over. It’s important because, as we soon discover, your sword can block Aumtlich beams, or even reflect them back. You can still get stuck without recourse, but only if you stand in a place where two beams cross, so that you can’t block them both at once. Even so, being able to block them at all feels like a superpower after experiencing helplessness as a goblin. At first, I took care to orient my sword correctly before stepping into a beam, just to avoid the scary noise it would trigger otherwise. But the game gradually makes this impossible, and after a while, you learn to not let it bother you.
| ↑1 | That’s a bit of a simplification, but I’ll spare you the details. |
|---|